PuTTY is a free terminal program used to send commands directly to a ProAudio switch, either over a serial cable or over the network. This article covers both connection methods, the terminal settings you need before connecting, and how to confirm the connection is working.
Connecting via Serial Port
To connect over serial you need a USB-to-serial cable that is straight through, not a null-modem cable. The switch has a female RS-232 connector, so the USB cable's connector must have male pins.
Serial as the connection type, enter the COM port in Serial Line, and set Speed to 19200.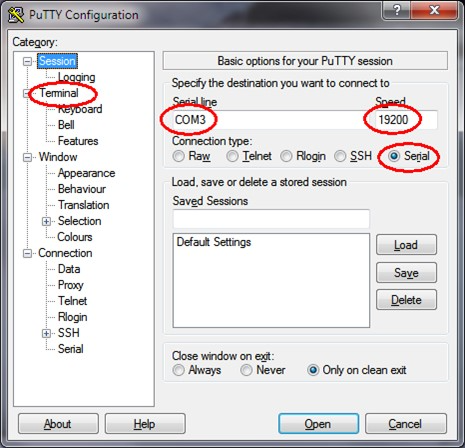
Once these settings are entered, continue to Setting Up Line Control Options below before opening the session.
Connecting via TCP/IP
To connect over TCP/IP you first need the switch's IP address. Search your network for the switch's MAC address, which begins with either 5C.D4.AB.xx.xx.xx or 00-15-82-xx-xx-xx depending on whether it was branded Zektor or Pulse-Eight when it was made.
Raw as the connection type, enter the switch's IP address in Host Name (or IP Address, and set Port to 50005.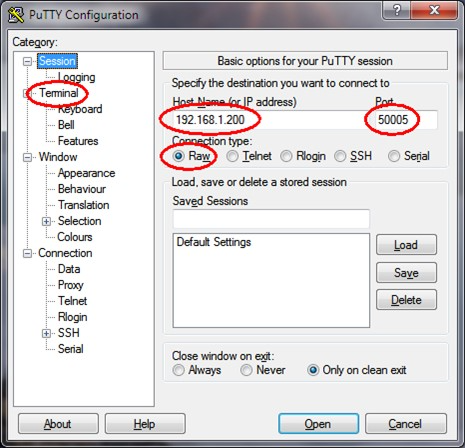
Once these settings are entered, continue to Setting Up Line Control Options below before opening the session.
Setting Up Line Control Options
Whether you're connecting over serial or TCP/IP, click Terminal in the Category tree next to set the line discipline options. These let you see what you type and edit it before sending.
Force on.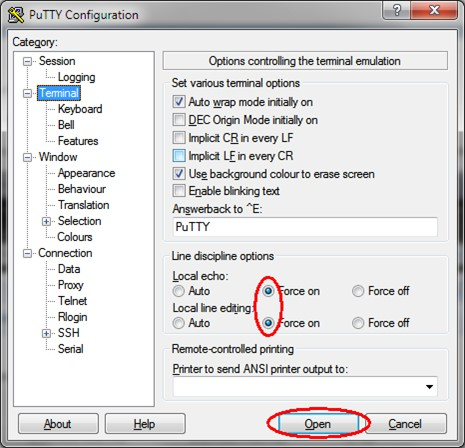
Testing the Connection
To confirm the connection is working, send the version command:
^V
Press Enter. You should see a response similar to this, with a string indicating your switch model, firmware version, and serial number:
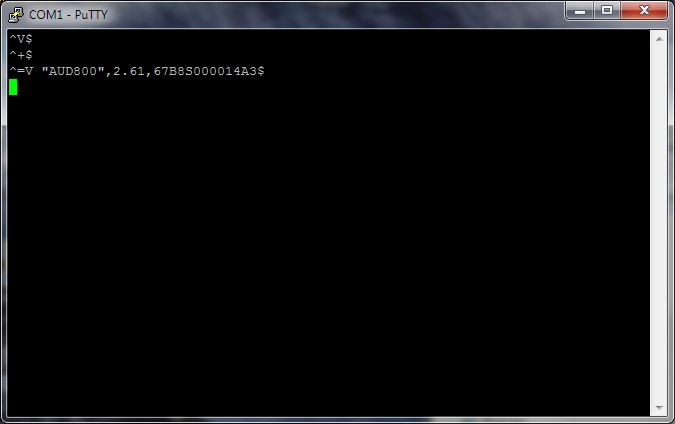
AUD800 is the switch model, 2.61 is the firmware version, and 67B8S000014A3 is the serial number. Your values will differ depending on your switch.Contact our support team and we'll help you get connected.
UK: 01202 413 610 | US: (858) 748-8250 | support@pulse-eight.com