There are two ways to set a Static IP on a ProAudio range matrix: using the ProAudio Config Tool, or via an RS-232 connection using zSetIP.exe.
Method 1 — ProAudio Config Tool
This is the recommended method. The Config Tool is available to registered installers at monitoring.pulse-eight.com.
1
Select your ProAudio matrixIn the Device Discovery screen, select the ProAudio you want to set to a Static IP. If it isn't listed, enter its current IP address in the Connect by IP Address section at the bottom of the page.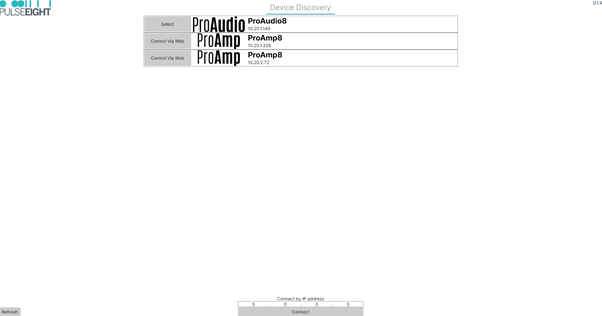
2
Enter the new Static IP detailsOnce the Config Tool UI populates, update the Static IP section with the new IP Address, Subnet Mask, and Gateway Address.3
Click "Set Static IP"Click 'Set Static IP' at the bottom of the Static IP section.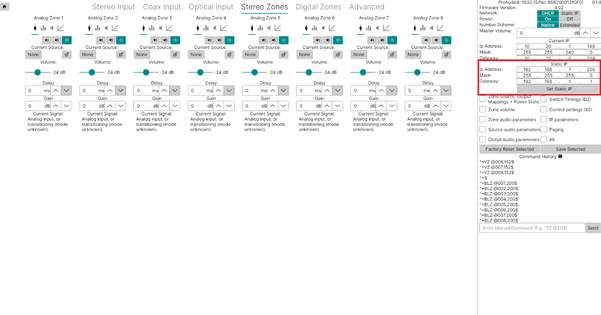
4
Switch the matrix to Static IPIn the Network row, click Static IP this sends the commands to apply the new address, and the tool repopulates using the new IP.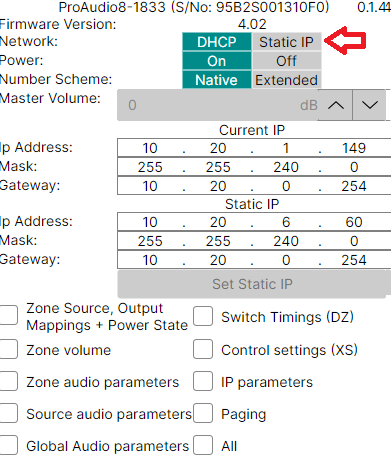
Back up the new IP settings, or they'll be lost on power failure. Tick IP parameters in the sidebar checklist, then click Save Selected. The Command History should show
^SS 32$ followed by ^+$ to confirm it saved successfully.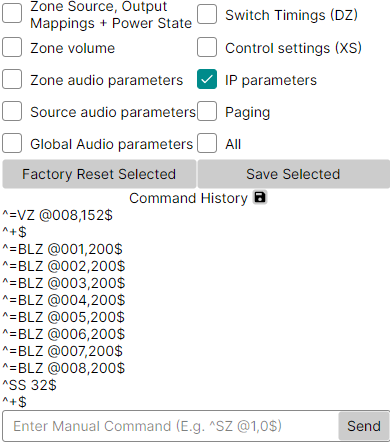
Method 2 — RS-232 with zSetIP.exe
1
Connect a serial port to the ProAudio switchUse either the front or rear panel serial port connector. A USB-to-Serial cable also works.2
Run zSetIP.exe Double-click zSetIP.exe - it will find your switch and display its current IP settings. Follow the on-screen menus to change the IP address settings.The new settings are backed up in EEPROM automatically and will be retained through a power cycle — no separate save step is needed with this method.
zSetIP.exe is provided as a downloadable attachment on this article (SetIP.7z, 9.21 KB) — attach the file when publishing.
Related Articles
Having trouble setting a Static IP?
Get in touch and we'll help you get it sorted.
UK: 01202 413 610 | US: (858) 748-8250 | support@pulse-eight.com
Get in touch and we'll help you get it sorted.
UK: 01202 413 610 | US: (858) 748-8250 | support@pulse-eight.com