INTRODUCTION
This driver has been designed to allow a Control4 system to communicate with the video matrix to allow brief monitoring, configuration, and maintenance.
DOWNLOAD AND INSTALL THE DRIVER
1. Go to monitoring.pulse-eight.com and login with your installer ID. If you do not have an installer ID please get in touch with your Pulse-Eight representative or Pulse-Eight directly.

2. Once logged in please hover over the ‘Documentation & Drivers’ tab at the top, then navigate your mouse down to the ‘Control 4’ section.
3. Select the driver for the model you're configuring and download.
CONFIGURE MATRIX DRIVER
1. Add the drivers by clicking on ‘Driver’ at the top, and then ‘Add or Update Driver’
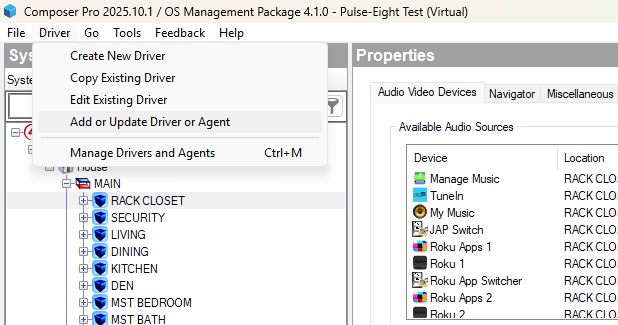
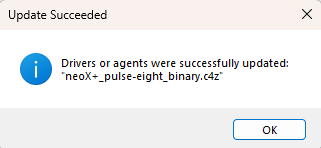
2. Locate the driver on your PC, select it and click open

You should then get the acknowledgement of Update Succeeded
3. While on the System Design tab click the Search tab on the right-hand side and search for the driver by the name, drag the driver from the Search window into the correct Room location or double click to add to the currently selected room.

4. Go to the Connections Settings and open the Network Tab
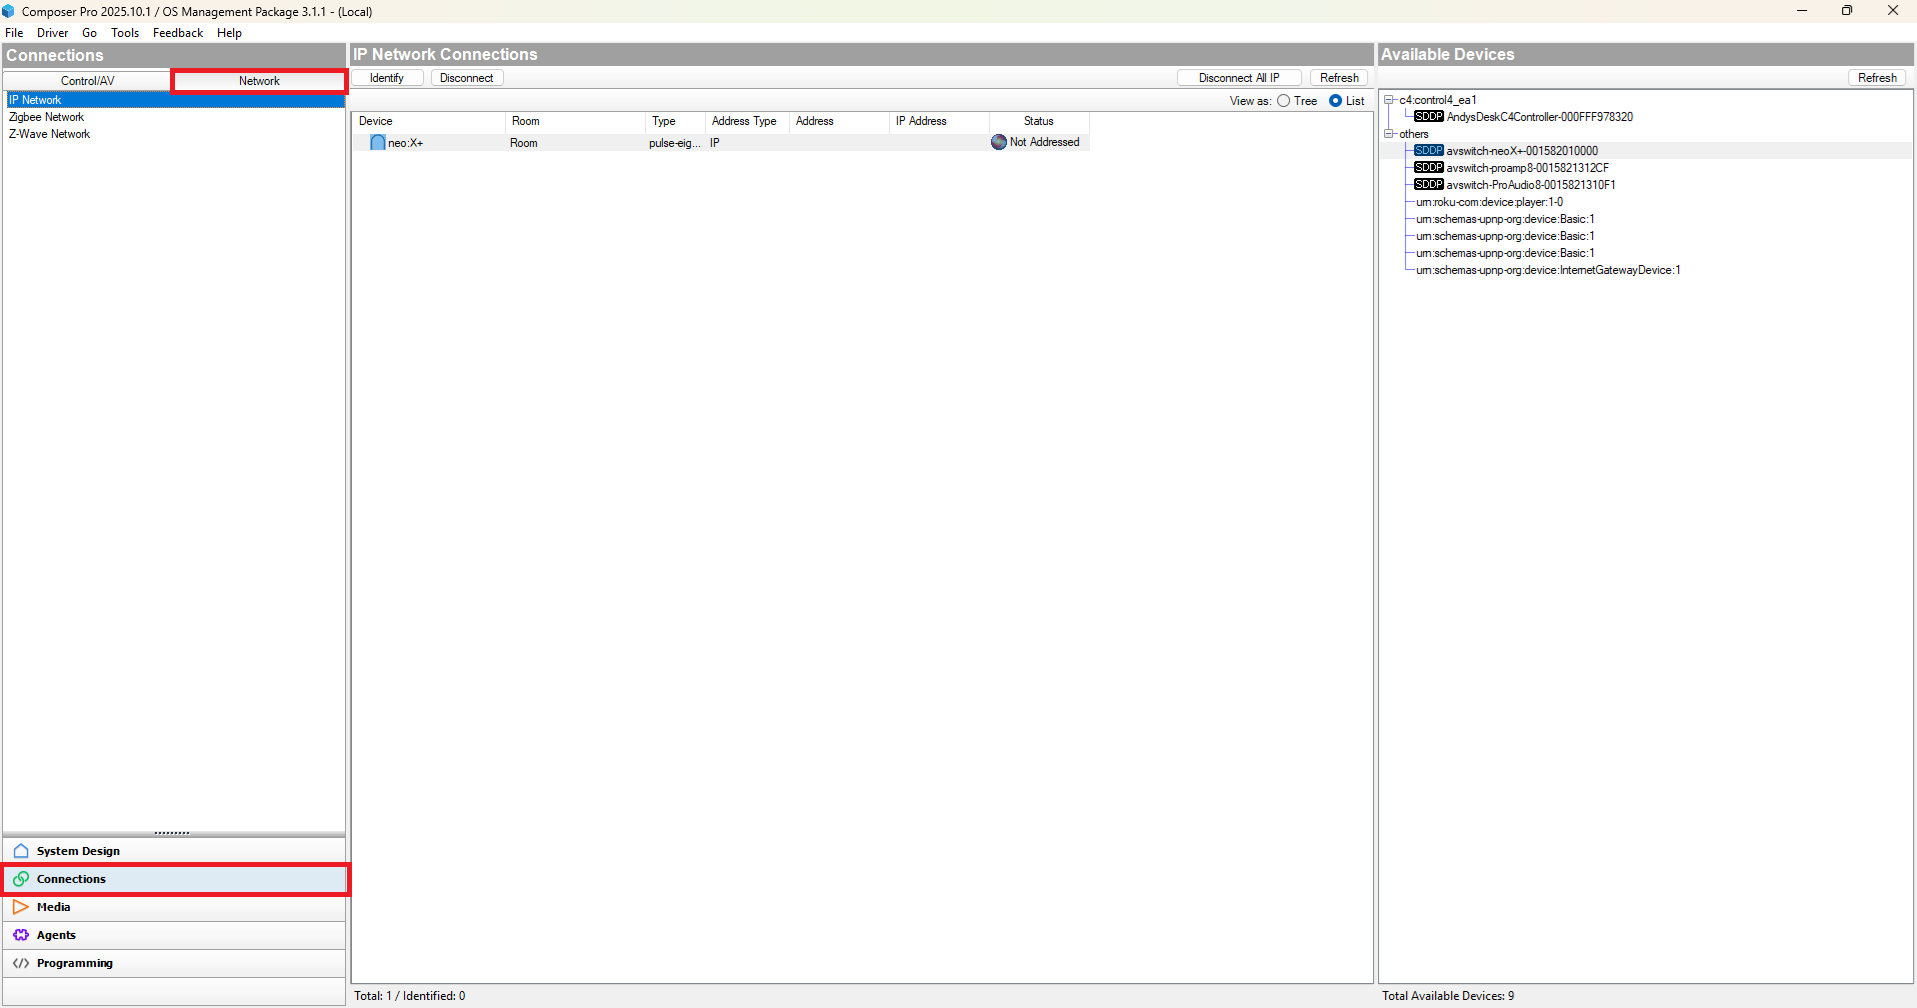
5a. Locate your matrix in the IP Network Connections tab in the middle of the screen and the Available Devices Tab on the right hand side of the screen. Drag the SDDP entry from the Available Devices Tab to the Matrix in the IP Network Connections Tab.

If this has worked successfully you should now see the status of your matrix listed in the IP Network Connections Tab
Note you may need to click off the Connections Tab and back for the matrix to show Online

5b. If you are unable to find your matrix via SDDP, Locate your matrix in the IP Network Connections tab in the middle of the screen and double click it. manually enter your Matrix IP address into the box highlighted, once this is done when you click close the matrix should be discovered.

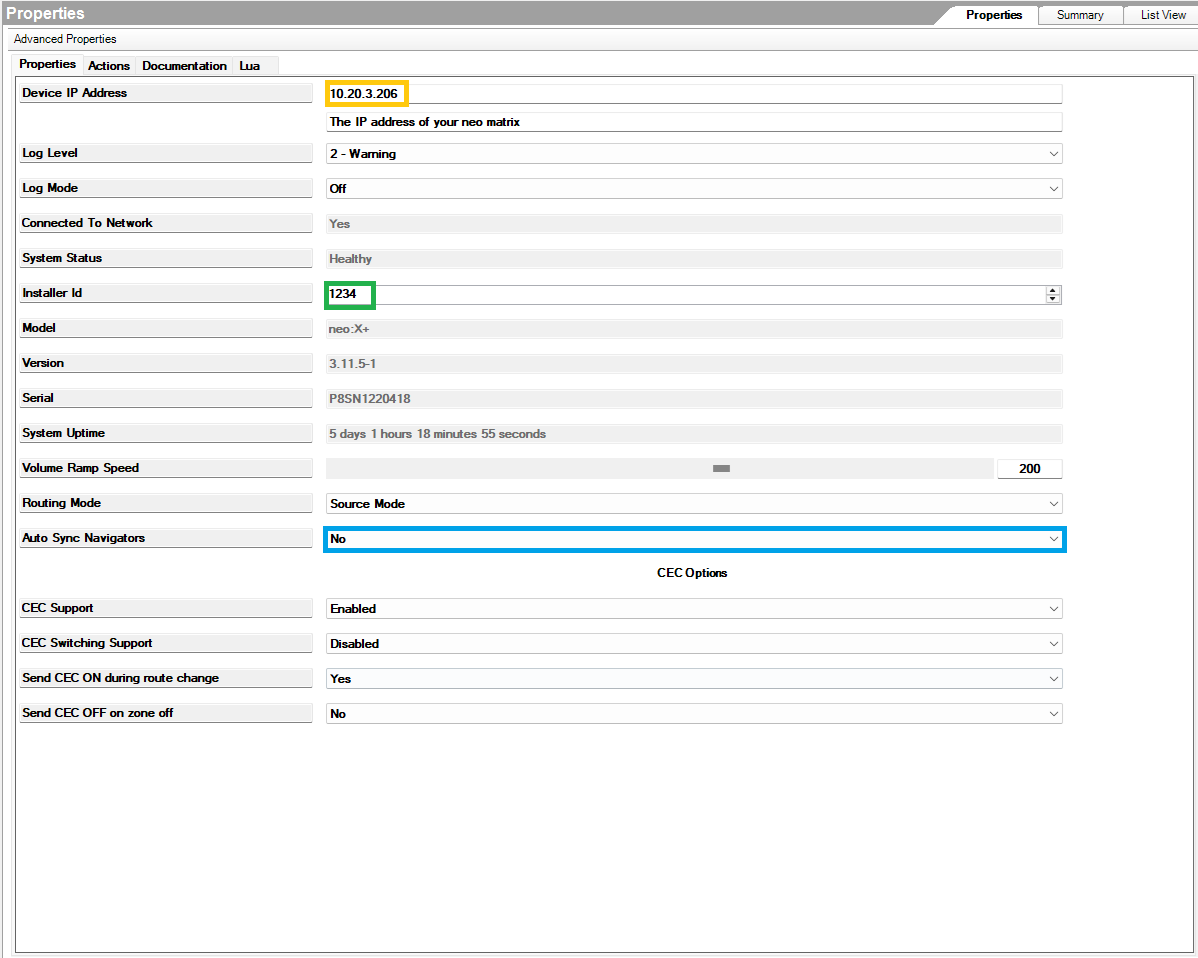
6. On the System Design Tab, locate the driver for the matrix
(Orange) If Discovery was successful then the IP of the matrix should appear here. If not follow the steps in the new help window to complete IP address configuration
(Green) You can set your installer ID here, instead of navigating back to the matrixes web interface to do this. Before you complete your installation, it is important that you set your Installer ID. This value is used to register this system to your monitoring account so you can monitor and support the system remotely. On the properties tab enter your 4-digit Installer Id and click set. Setting this value will also trigger a Monitoring Pulse to be sent so it should appear in your account immediately.
(Blue) By default the matrix driver has enabled two-way feedback, to maintain state information with attached navigators (such as SR260) if you don’t require this feature, you can disable it here.
6. Click on the Connections tab (bottom left) and click into the Control/AV tab, select the matrix driver from the list on the Control/AV tab.
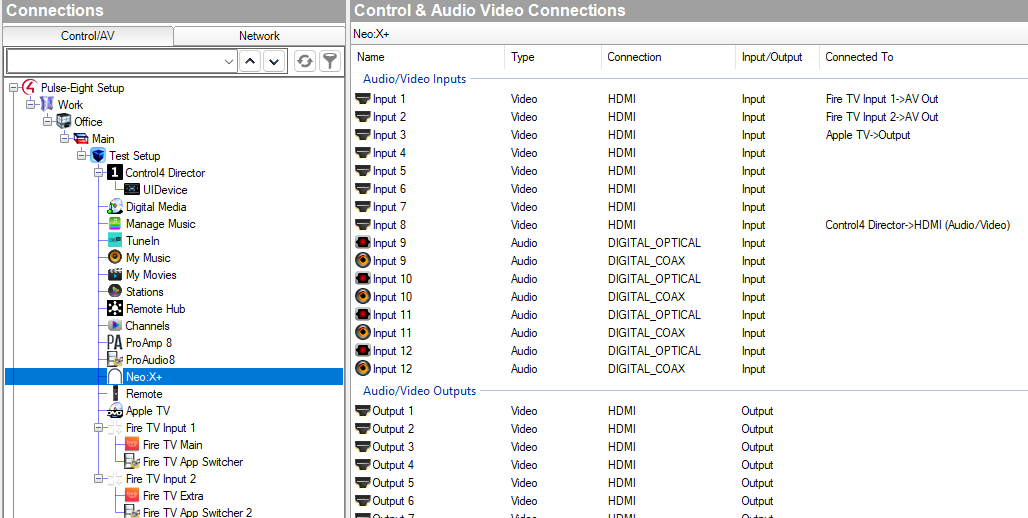
7. Setting the connections is no different that any other driver, however ensure that the Inputs and Outputs match the physical wiring as per the matrix.
8. Setup is now complete. You may need to restart the director for all changes to be applied correctly. However this is not commonly required.
PROPERTIES
On the properties tab you can examine various core values about the system, these are read only and automatically updated every few seconds.
If something is not working correctly you can enable Log Mode, set this option to Print and the Log Level to 5 – Debug for maximum information.
ACTIONS
There are currently three buttons available in ComposerPro for this driver:
- Reboot System
- Restarts the system immediately, doing so will interrupt video routing briefly
- Discover System
- Used to automatically discover the Device IP Address of the system where possible
- Send Monitoring Pulse
- Trigger an immediate monitoring pulse to be sent, returning current system health data to monitoring.pulse-eight.com
Was this article helpful?
That’s Great!
Thank you for your feedback
Sorry! We couldn't be helpful
Thank you for your feedback
Feedback sent
We appreciate your effort and will try to fix the article